Cooking a can of green beans is simple and straightforward. Start by opening the can and draining the beans. Then, pour them into a pot and add water. Bring the water to a boil and let the beans simmer for about 5-7 minutes. Finally, drain the water, season the beans to taste, and serve hot. Enjoy your delicious and nutritious green beans.
How to cook a can of green beans? With just a few simple steps, you can transform those ordinary veggies into a mouthwatering dish bursting with flavour. Let’s dive into the easy and delightful process of cooking green beans using our trusty kitchen companion, the Quri.
To cook a can of green-beans, start by draining the liquid from the can. Then, pour the beans into a saucepan and add a little water or broth. Heat the beans over medium heat until they’re warmed through, stirring occasionally. Season with salt, pepper, and any other desired spices. Enjoy your quick and easy side dish.
Ingredients
Canned green beans are a convenient pantry staple that retains much of the freshness and nutritional value of their fresh counterparts. When selecting canned green-beans, opt for varieties that are labelled as low-sodium or no-salt-added to control the amount of sodium in your dish. Additionally, consider choosing cans that are BPA-free for a healthier option. While the canned beans are already cooked, they may benefit from additional seasoning and flavourings to enhance their taste.
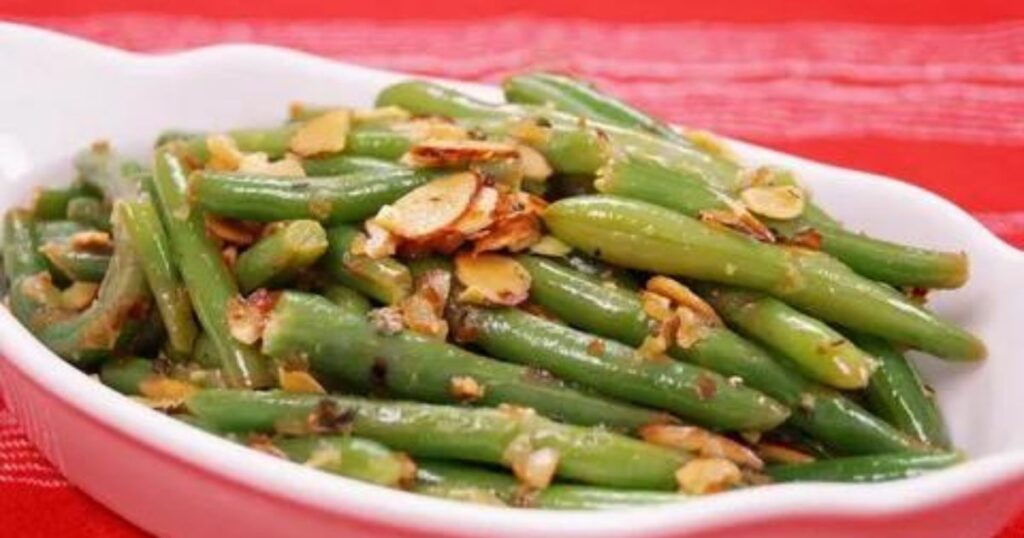
Basic seasonings like salt and pepper can elevate the flavour profile of the green-beans, while additions like garlic powder, onion powder, or dried herbs offer versatility and depth of flavour. For those looking to add richness, a pat of butter or a drizzle of olive oil can provide a luxurious finish to the dish without much effort. These simple ingredients work together to create a delicious and satisfying side dish that complements a wide range of main courses.
Instructions
Before you begin cooking, it’s important to gather all the necessary equipment. You’ll need a can opener to open the can of green-beans. Make sure it’s in good working condition to avoid any frustrations. Additionally, have a strainer or colander ready to drain the beans after opening the can. This will help remove any excess liquid from the canning process. Next, grab a saucepan to cook the beans on the stovetop. Choose a saucepan that’s large enough to hold the beans comfortably. Finally, have a spoon or spatula on hand for stirring the beans as they cook. With all your equipment ready to go, you’ll be able to cook your green-beans efficiently and without any hiccups.
Opening and Draining the Can
With your equipment prepared, it’s time to open the can of green-beans. Use the can opener to carefully remove the lid, being mindful of any sharp edges along the rim. Once the can is open, pour the contents into the strainer or colander placed in the sink. Allow the excess liquid to drain away, giving the strainer a gentle shake if needed to help the process along. This step is crucial for removing any excess salt or preservatives from the can, resulting in a fresher taste. Once the beans are drained, they’re ready to be cooked in the saucepan. With these simple steps, you’re well on your way to enjoying delicious green beans in no time.
Rinse the Beans (Optional)
Rinsing canned green beans is an optional step in the cooking process, but it can have a noticeable impact on the final flavour and texture of the dish. When green beans are canned, they’re typically preserved in a liquid solution containing salt and other additives. Rinsing the beans under cold water helps to remove any excess salt or preservatives, resulting in a milder flavour profile. Additionally, rinsing can help to wash away any residue or impurities that may be present on the surface of the beans, ensuring a cleaner and fresher taste.
Furthermore, rinsing the green beans can also affect their texture during cooking.
By removing some of the excess sodium from the canning liquid, the beans may retain more of their natural firmness and crispness when cooked. This can be particularly beneficial if you prefer your green beans to have a bit of crunch, rather than being overly soft or mushy. Ultimately, while rinsing canned green beans is not essential, taking the extra step to do so can enhance the overall quality of the dish and provide a more enjoyable eating experience.
Transfer to a Saucepan
After draining and rinsing (if desired), transfer the green beans to a saucepan. If you prefer softer green beans, you can add a small amount of water to the saucepan, enough to cover the bottom of the pan. Alternatively, you can cook the beans without additional water for a firmer texture.Season to Taste: At this point, you can season the green beans according to your preference. Common seasonings include salt, pepper, garlic powder, onion powder, or herbs such as thyme or parsley. Additionally, you can add a pat of butter or a drizzle of olive oil for extra flavour.
Heat and Simmer
Once you’ve seasoned the green beans to your liking, it’s time to bring them to life over the heat. Placing the saucepan over a medium flame, watch as the green beans gradually come to a gentle simmer. This slow cooking process allows the flavours to meld together while ensuring the beans cook evenly throughout. As they simmer, the aroma of the seasonings fills the air, promising a delightful culinary experience ahead. Stirring occasionally, you’ll notice the green beans softening and becoming more tender with each passing minute.
As the green beans simmer, their vibrant colour intensifies, hinting at the nutritional goodness within. This gentle cooking method not only preserves the beans’ natural colour but also helps retain their vitamins and minerals. Whether you prefer your green beans with a bit of crunch or perfectly tender, you have full control over the cooking time. Keep an eye on the saucepan, adjusting the heat as needed to maintain a steady simmer. In just a matter of minutes, your canned green beans will be transformed into a mouthwatering side dish, ready to be served and savoured.
Serve and Enjoy
Once the green beans are cooked to your desired level of tenderness, remove the saucepan from the heat. Transfer the beans to a serving dish and serve immediately as a delicious side dish alongside your favourite main course.Cooking a can of green beans is a quick and simple way to incorporate this nutritious vegetable into your meals. Whether you’re preparing a family dinner or a solo meal, canned green beans offer convenience and versatility without compromising on taste or quality.
just a few basic ingredients and minimal preparation, you can enjoy a flavorful and satisfying dish that’s sure to please your taste buds. So the next time you’re in need of a quick and easy side dish, reach for a can of green beans and follow these simple steps for a delicious culinary experience.
Faqs
How long do canned green beans last?
years if stored properly.
Can I eat canned green beans straight from the can?
Yes, but heating improves flavour.
Are canned green beans healthy?
Yes, they retain nutrients.
Can I freeze leftover canned green beans?
Yes, for up to 3 months.
What are creative ways to use canned green beans?
In soups, salads, or casseroles.
Conclusion
In conclusion, cooking a can of green beans is a simple and convenient way to enjoy this nutritious vegetable as a tasty side dish or ingredient in various recipes. With just a few basic steps, you can transform canned green beans into a flavorful and satisfying addition to your meal. Whether you’re pressed for time or looking to add some extra veggies to your diet, canned green beans offer versatility and ease without compromising on taste or quality. So the next time you’re in the kitchen, don’t overlook the humble can of green beans – with a little creativity and imagination, you can turn them into something delicious.
click on this link to get more information “How To Cook Delmonico Steak?”